|
Mushroom Dyes
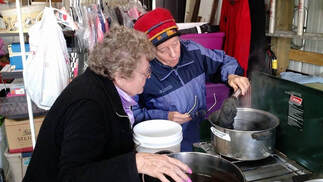
A variety of fungi found in New Jersey can be used to dye natural fibers into an amazing array of colors. Miriam Rice, a fiber artist from Northern California, discovered the process of using mushrooms for pigments in the early 1970s. She tossed a bunch of Hypholoma fasciculare into a pot of simmering water with a little wool yarn. Fortunately, her experiment turned the wool a lovely lemon yellow, and the art of mushroom dyeing was born. Experimenting with different mushroom species, she and other dyers discovered a variety of colors can be extracted from sometimes nondescript little mushrooms. If you are interested in fiber arts and want to experience the magic of fugal alchemy, you may want to explore Myco-dyeing. Steps in the dyeing process.
Good Dyers
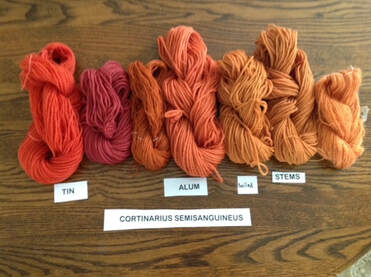
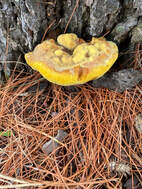
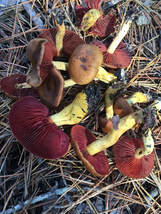
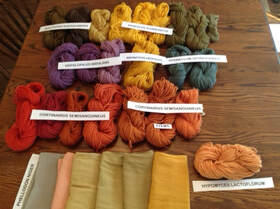
Many, but not all fungal species are good dyers. Here are a few New Jersey species to try:
|
Considerations:
Mushroom dyeing is a multi-step process. Protein based natural fibers like 100% wool and silk are the best at taking up these natural pigments. Some of the chemicals used in dying are toxic. Pots that are used for cooking food should not be used. If possible mordanting and dyeing should be done outside or in a well ventilated area, and gloves should be worn. Wool and the mordanting or dyeing solutions should be at similar temperatures to avoid felting (shrinking) the yarn. Mordants
Alum (potassium aluminum sulfate) will brighten colors. 1 Tablespoon +2 teaspoons of Alum 2 teaspoons of Cream of Tartar Iron (Ferrous Sulfate) will sadden colors, and in some cases change the color entirely. 2 teaspoons Iron (Ferrous Sulfate) 1/2 Cream of Tarter 1 Tablespoon Glauber’s salt (sodium sulfate) |
|
Workshops
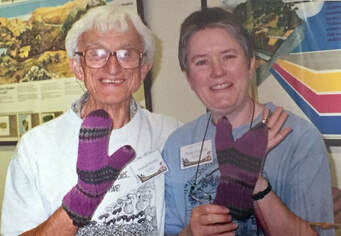
An NJMA dye workshop was in held in 2016. Ursula Pohl, our club’s Dye-meister, shared her extensive knowledge with the lucky participants. During this day long workshop we used 8 species of fungi with different mordants to obtain 20 beautiful colors. Myco-dyeing is a labor intensive, but magical experience. If you are a knitter or weaver you might be interested in giving it a try, or joining our next workshop. |
Helpful references:
Mordants and dyers supplies can be ordered online from a number of sources including:
- The Rainbow Beneath My Feet, A Mushroom Dyers Field Guide, by Arleen Rainis Bessette and Alan Bessette
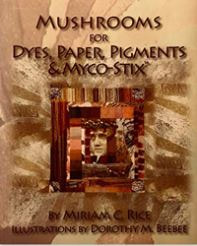
- Mushrooms for Dyes, Paper, Pigments and Myco-Stix, by Miriam Rice with illustrations by Dorothy Beebee.
- The Facebook Groups: Mushroom and Lichen Dyers United and Mushroom Dyers Trading Post
- Websites: (www.mushroomsforcolor.com) Information on the International Mushroom Dye Institute and the biannual workshops held around the world.
Mordants and dyers supplies can be ordered online from a number of sources including:
- The Dharma Trading Company
- The Woolery
- The Dyer Supplier
- Amazon
- Local knitting stores have an assortment of yarns.
- Online yarn sources include yarn.com and jimmybeanswool.com
HAVE FUN MAKING PAPER FROM FUNGI
Testimonial:
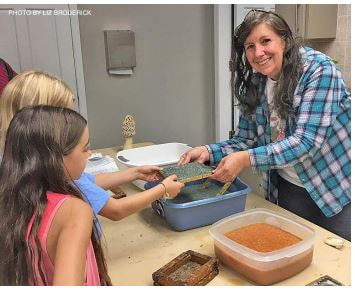
I was first introduced to paper making in 2007 during that year’s Fungus Fest. Nina Borough used to teach papermaking then. My daughter Aluen was 5 and we were surprised to learn we could make paper from mushrooms. After we joined the club, I asked Nina if she could come to our Girl Scout Brownie meeting to teach the girls how to make paper from fungi. During that meeting I realized how much fear people have towards mushrooms in the USA. The girls were having fun making the paper, but the parents were all nervous about touching the mushroom pulp. We needed to calm them down by assuring them that handling the birch polypore pulp was risk free.
Later on I asked Nina if she would similarly present fungi paper making at the Lawrence Nature Center as part of the center’s Family Tuesday night sessions. Nina’s response was to tell me that I should do it, but she would help.
Since 2009, I have been annually demonstrating paper making during Fungus Fest. In the beginning my husband would assist me, but later on he was asked to help elsewhere so my older daughters took his place. Recently it has been my youngest daughter, Aluen, that has been my assistant.
In 2019, for Lawrence High School’s STEM Academy my daughter and her peer created a seminar about mushrooms during which she showed how to make mushroom paper as she learned at Fungus Fest so many years ago.
Each year at Fungus Fest people are surprised to learn that paper can be made from mushrooms. It is the same surprise we experienced years ago.
- Virginia Tomat
A LITTLE ABOUT PAPERMAKING
When you create regular paper, processed wood is employed to obtain cellulose as the primary pulp component. Mushrooms are not plants but they have something similar to cellulose called chitin. You find chitin in insects and arthropods. Mushrooms are closer to the animal kingdom than the plant kingdom with chitin being their most important structural component. In paper making with mushrooms, chitin rather than cellulose is the backbone material.
Note: Chitin was first discovered in the cell walls of mushrooms by professor Henri Braconnot in 1811. At that time it was called fungine.
Note: Chitin was first discovered in the cell walls of mushrooms by professor Henri Braconnot in 1811. At that time it was called fungine.
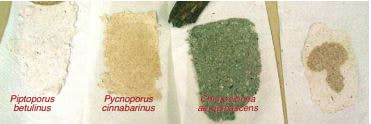
- The main mushrooms used in mushroom papermaking are polypores, specifically birch polypore and turkey tails.
- These mushrooms are cut into pieces with a hammer and/or a strong knife and placed into a blender with some water, where they are chopped into fine pieces.
- If too thick, these pieces are then mixed and diluted with more water until a pulp is produced.
- The pulp is later extracted using a cheese cloth and the water is removed as much as possible until only pulp remains. (You can freeze it for later use).
- When ready to be used, some of the pulp is diluted in water and blended in a blender. It is then further diluted with more water in a pan.
- A mesh filter is then used to extract the pulp in the same manner as in the production of other types of homemade paper.
- The sheet of pulp is then couched and dried by pressing it on newspaper and then allowed to air dry for up to several days. Couching (pronounced ‘coo-ching’), is the term papermakers use to describe transferring a newly formed sheet of paper from the mold to the felts.
- The product is an off-white paper if birch polypore is solely employed.
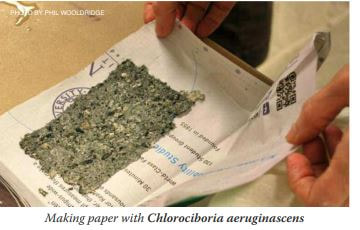
- Color paper results from the addition of pulverized colored mushrooms such as Pycnoporus cinnabarinus (orange) or green stain mushroom Chlorociboria aeruginascens (blue-green) added in the pulp mixture before extracting it with the mesh.
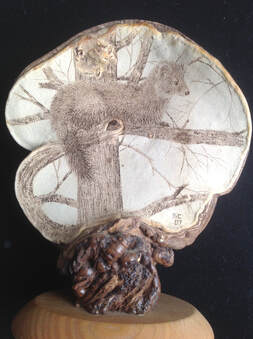
- The resulting mushroom paper can be used for many creative ends, be they as simple as making and decorating greeting cards or as complex as making a completely mushroom-based piece of artwork to hang in your home.
Additional Resources
|
|
Jewelry Making
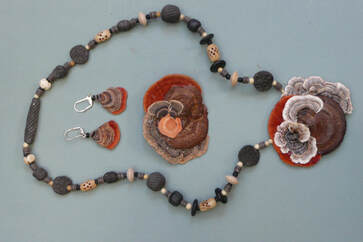
Rhoda Roper creates FUNGEMS like those pictured on this page. She has been mushrooming most of her adult life. You may have noticed a photo of her tree fungi jewelry in book The Complete Mushroom Hunter. In her non-mushroom life, she has been a textile designer and a set designer. In 2013, she was the instructor at an NJMA Educational Workshop: Tree Fungi Jewelry. References Lincoff, Gary, The Complete Mushroom Hunter, Revised, 2017, Quarry Books; Illustrated edition, page 182 |
|
Spore Art
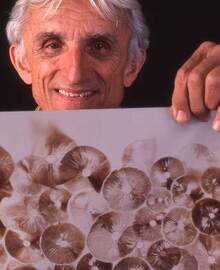
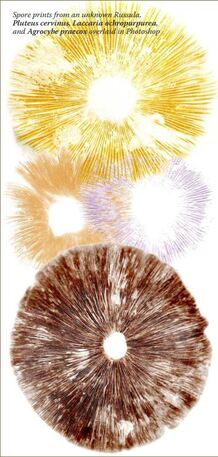
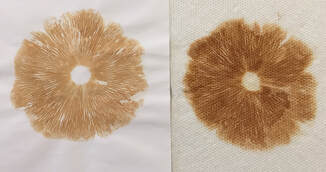
Based on NJMA News 11-9, September 1981, by Dr. Sam Ristich Let us introduce you to the stimulating hobby of spore art. If you are capable of doing your own composing and framing, spore art can be a challenging hobby, but also a source of money. First, if you are not familiar with spore prints, see this NAMA article on how to take and preserve a spore print. To make art, the important ingredients are the proper paper or index cards, lacquer spray with a fine nozzle, optimum age fungi and covers for the fungi while you are spore printing. Some of the best sporophores are (a) gilled - Stropharia rugoso-annulata, Pluteus cervinus, Psathrella candolleana, Coprinus atramentarius, Pholiota sp., Crepidotus sp., Russula (cream-yellow spores); (b) non-gilled - all boletes if not too old or too wormy, "ripe" Dadinia, Hydnums, Hydnellums, Ramarias, especially Ramaria stricta. If you wish to overprint the dark prints, use white spored gilled species such as Russulas, Lepiotas, Oudemansiella radicata. |
For Framing
I find semi-glossy (one or both sides) opalescent mylar sheets are the best. These are sold in most art, stationary or drafting stores in rolls 17 - 24 inch wide. It is not cheap, but it is waterproof, very electrostatic to hold spores while you spray, and you can overprint and respray. If you choose paper, look for something with the characteristics of index cards.
For Cards
Use any size index card and follow the same system as for mylar with the following admonitions:
Overall cautions: Don't select sporophores which are too old, since these have insects (though on mylar paper these insect tracks make fascinating designs), and contain considerable moisture. Also watch the reverse, if the sporophore is not mature, spores will not be "cast". Do not overprint. Thick deposits are not easily fixed.
I find semi-glossy (one or both sides) opalescent mylar sheets are the best. These are sold in most art, stationary or drafting stores in rolls 17 - 24 inch wide. It is not cheap, but it is waterproof, very electrostatic to hold spores while you spray, and you can overprint and respray. If you choose paper, look for something with the characteristics of index cards.
- Place sheets on a flat surface, select fungi and covers. For stipitate forms, cut the stipe as close to the cap as practical without bruising gills. For large forms (4" or larger) cut stem long enough to keep gills or pores off the paper. This technique will reduce smudging and spore pile-up.
- Arrange fungi on paper leaving room for a border.
- Place cover on fungi. If you want wisping designs, prop covers onto a pencil or some thinner object. Air currents will cause the wispy design.
- Check spore density in one hour. Good 'spore givers' make excellent prints in one hour. If spores are too dense, you need more spray to fix the print, thus detracting from the design. If one hour is not sufficient, set the time for another hour.
- Lift fungi off the sheet carefully to prevent smudging by using a knife or needle.
- Spraying - Tape sheet in some area like a cellar or garage about 10 minutes after you have lifted off the fungi. Don't spray lacquer in the house. Keep at least 12" from the print while you spray. Spray in sweeping movements and only about 5 seconds between sprays. Check your coverage after each five-second spray cycle. Most prints can be fixed by three five-second sprays. Over spraying will result in bleeding and pile-up. If in doubt, wait 10 minutes and stroke lightly. give another five-second burst. If print is fixed completely you can overprint in about an hour. (Do not use shellac or varnish since these dry too slowly and may leave color.) Caution: Make trial runs on index cards before you tie up valuable money on mylar. Do not allow printing to continue overnight. If water accumulates on the sheet, allow it to evaporate before you spray. Most excellent "spore givers" will make five to six prints 1 - 1.5 hours apart.
For Cards
Use any size index card and follow the same system as for mylar with the following admonitions:
- Watch for condensation since paper is not waterproof.
- Spray more gently to prevent spore "blow off".
Overall cautions: Don't select sporophores which are too old, since these have insects (though on mylar paper these insect tracks make fascinating designs), and contain considerable moisture. Also watch the reverse, if the sporophore is not mature, spores will not be "cast". Do not overprint. Thick deposits are not easily fixed.
Last Updated: 2024-04-18


